How To Remove Hardwood Flooring (Step-By-Step Guide)
Removing a hardwood floor can be considered one of the most difficult home renovation tasks because it’s tedious, time-consuming, and sometimes also expensive. That being said, if you know how to do it right, you can get through the process much more easily. Keep reading as we will be describing how to remove hardwood flooring with a step-by-step actionable plan. Follow these eight steps

By Sarah Londerville | Updated January 9, 2023
Removing a hardwood floor can be considered one of the most difficult home renovation tasks because it's tedious, time-consuming, and sometimes also expensive. That being said, if you know how to do it right, you can get through the process much more easily.
Keep reading as we will be describing how to remove hardwood flooring with a step-by-step actionable plan. Follow these eight steps to move forward confidently.
When to Remove Hardwood Flooring
First, decide if you truly want to remove hardwood flooring rather than just staining it for a fresh look. Here are some signs you should remove your hardwood flooring:
- Water damage: If your flooring has water damage, there's no staining over that. Plus, it could lead to mold or mildew, which has negative health impacts.
- You have mold or mildew growing on your floors: Mold is bad for your health, so replacing your old flooring entirely is necessary.
- Exposed nails: Stray nails could hurt you, your children, or your pets.
- Wear and tear: A few scratches here and there are pretty normal. But the damage is excessive, it's time to get a new floor.
- Creaking or moving hardwood: These are signs your boards are damaged, and we recommend you remove your hardwood floors.
- You've refinished them a lot: Every time you refinish your floors, you're sanding them down. Too much refinishing leaves the floorboards too thin and likely to damage.
- Your floor is uneven: If this is the case, it might mean there's a problem with the sub-flooring beneath it. Remove your hardwood and inspect both your sub-flooring and joists for any issues before laying down new hardwood.
- Structural issues: Over time, your house can settle too far into the ground and cause structural issues. This means your hardwood floors will need to be replaced (and other structural problems will need to be fixed by a professional as well).
If you are facing any of the issues described in this list, we recommend moving forward with replacing your hardwood flooring. It's an investment, but it can save you from more work and expenses in the long run.
Step-by-Step Guide: Removing Hardwood Flooring
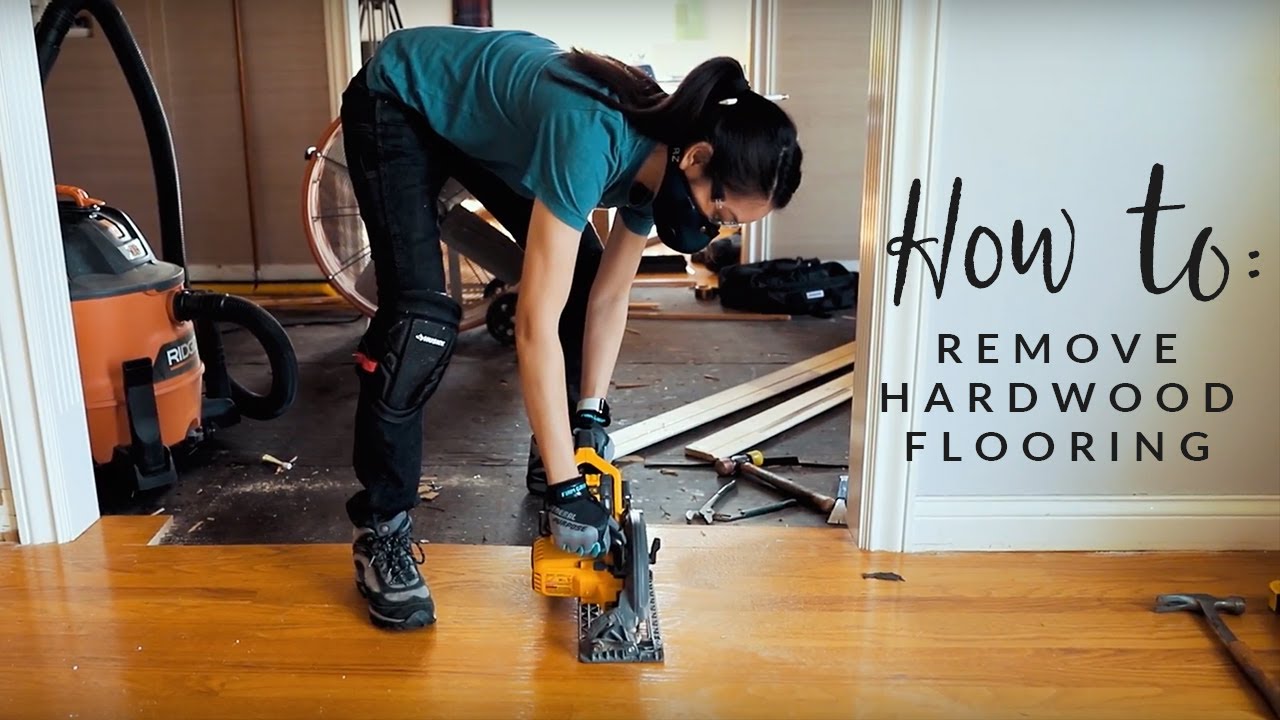
1) Get the Proper Tools and Safety Gear
When you decide to remove hardwood flooring, you'll need the right tools and safety gear. Here are the tools we recommend getting to make the entire process easier:
Tools ?
- Tape
- Hammer
- Pry bar
- Trim puller
- Circular saw
- Saw blade
- Sledgehammer
- Painter's tool
- Multi-Max MM35
- Nail claw
- Locking pliers
- Vice grips
- Tarp
Safety Gear ?
Along with the right tools, you'll need the right personal protective equipment. Put your safety first and ensure you have the correct safety gear. Your health matters, so use:
- Knee pads
- Work gloves
- Safety glasses
- Dust mask or N95
- Hearing protection
- Great boots
2) Remove or Cover All Furniture and Items ?️
Before you start, we highly recommend removing all the furniture from the room you're working on. That'll make the entire process much easier.
But if you can't, or you're only removing a section of the room and want to push the furniture onto the other flooring, then cover all the items you want to keep clean. You really don't want sawdust everywhere and on all your accessories, decorations, light fixtures, construction supplies, and spaces.
If you need to cover anything, use a tarp. Following this step can make cleaning up afterward much easier.
3) Determine the Scope of Your Project ?
Know what areas are included in your project. If you're removing the entire floor, we recommend breaking up the process into manageable sections.
Identify where you'll start by identifying your small sections with tape. This helps you stay organized and avoid accidentally starting on any areas you didn't want to remove.
4) Score the Baseboards to Remove Them ?️
Now's the time to score the baseboards with a painter's tool. Score the full length of the baseboard where it meets the wall, so you can avoid tearing paint or paper from your drywall.
Here are some tools you can use instead of a painter's tool:
- Box cutter
- Trim puller
- Utility knife
Next, check your surrounding surfaces for any nails or screws that might be holding up baseboards or moldings; these need to be removed so that they don't interfere with your installation process. Carefully remove them using your pry bar (or a crowbar).
Finally, start removing the baseboards. Gently use your tools to pry the baseboard from the wall, using it every 8-10 inches to keep removing the baseboards.
5) Start Cutting Into Sections ✂️
If you want to reuse your wood for other DIY projects, then you'll want to avoid cutting it into such small sections. This is for those who don't have any plans to reuse their materials.
After your baseboards are removed, you're ready to use your circular saw to cut off a small, marked section. Firstly, make sure your saw blade is set deep enough to cut the entire floorboards but not too deep to avoid cutting the bottom plywood and subfloor.
We recommend cutting the sheets into 3-foot sections because the hardwood will be very difficult to remove in large sections. Use the circular saw to draw lines in a perpendicular direction to the wood panels.
This makes it easier for the saw to slide, and you'll avoid cutting into nails along the way.
6) Lift the Sections ?️
Once you've made your cuts, you're ready to lift each section of wood sheets. If you're reusing your materials for future projects, be careful when you use your pry bar.
You'll need to put your pry bar underneath the wood floors and gradually raise the sheets while you move the pry bar. This will be a slower process, but it will prevent cracking.
However, if you're not planning to reuse the wood, just insert the bar under each sheet. Apply the necessary force until it's lifted.
Again, this will most likely result in splitting the sheets, so only do this if you do not want to reuse your wood.
7) Remove the Nails and Staples ?
When your sheets are all lifted, remove the nails and staples that the wood was held in place by. This will be more challenging and tedious than the wood sheets themselves.
Each nail and staple needs to be pulled out one by one. We recommend using:
- A nail claw
- A hammer or sledgehammer
- If needed, a large magnet can help too
After this step, be very careful with your cleanup process. These loose materials can cause injuries.
8) Continue the Clean-Up Process ?
Even if you used a tarp to cover everything you wanted to protect, you'll still have sawdust everywhere. We recommend cleaning up and vacuuming the entire floor, so you can move forward with the installation process with a clean area.
If you carefully followed all of our steps, then it’s time to pat yourself on the back. Nice job!
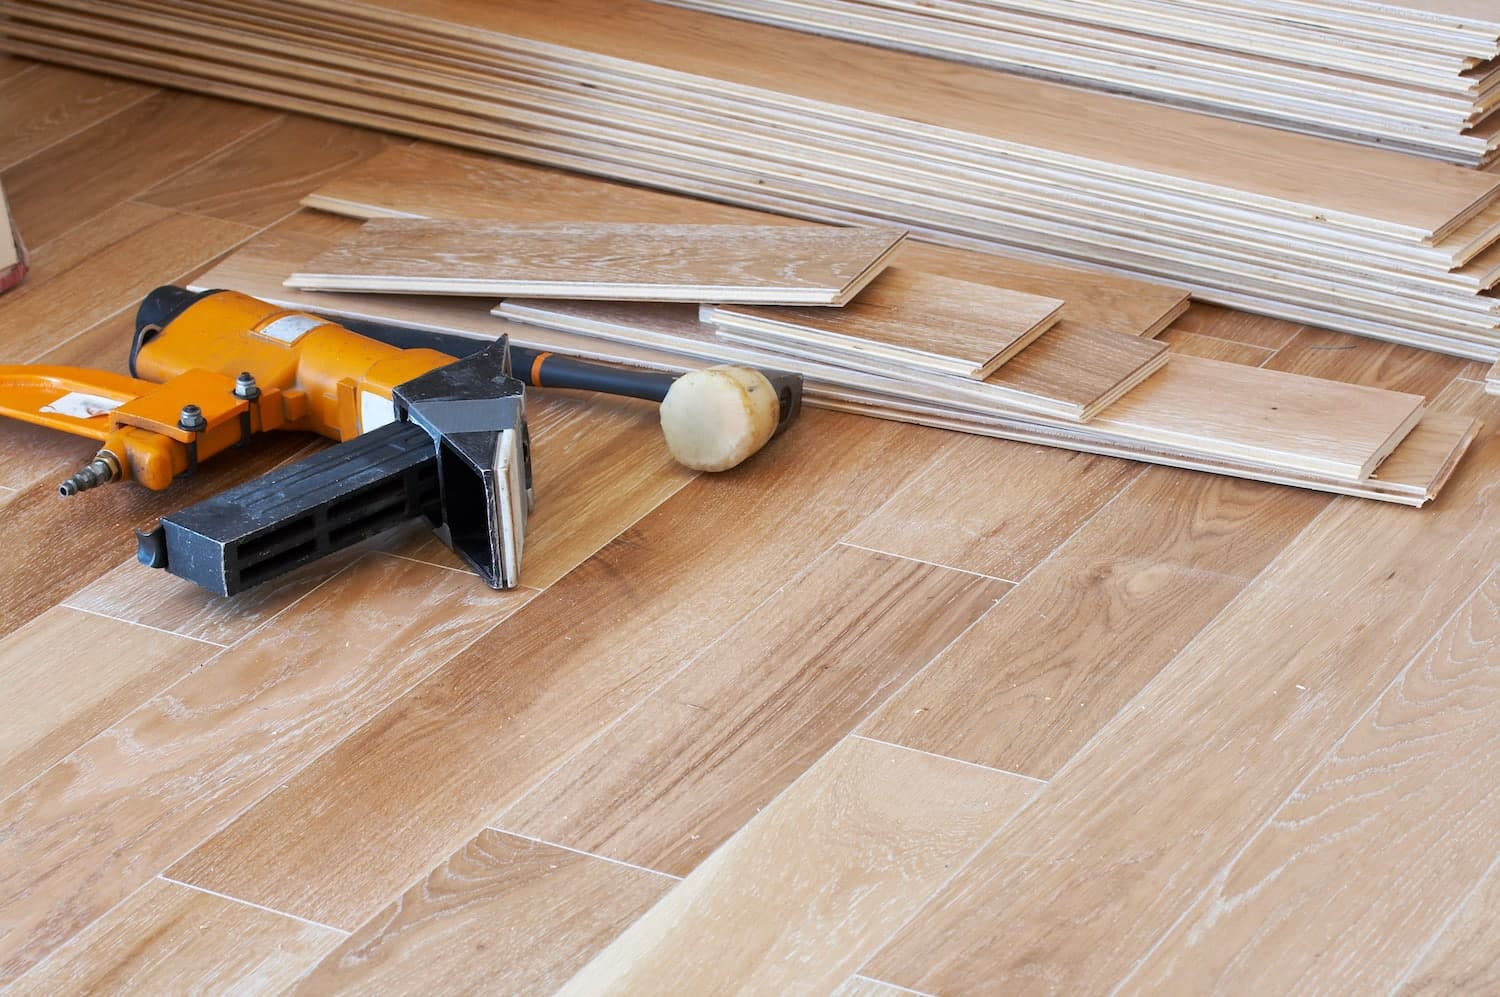
It's not always easy to remove the hardwood flooring. Now, you're ready to start thinking about how to replace your old flooring to breathe new life into your home—and we highly recommend opting for reclaimed wood.
Benefits of Replacing the Floor with Reclaimed Wood
Now that you're ready to install new floors, you'll need to think about what new material you'll put down. Here's why most homeowners choose reclaimed wood:
- It's less expensive and cost-effective compared to all-new hardwood flooring.
- Reclaimed wood offers an antique, vintage, beautiful look with a lot of character. You can create a distinctive, desirable look that’s unique to you and your family—meaning your home won't look like everyone else's.
- They're environmentally friendly, using recycled materials. It reduces your carbon footprint by saving the energy used and eliminating the pollutants that would have been used to create new materials.
- There's a seemingly never-ending, high-quality list of rustic styles to choose from. You'll have endless colors, textures, and sizes to consider.
- Reclaimed wood provides greater stability, with more durability and strength.
- It's far easier to maintain, and they hold their value.
- There will be fewer seams in the floor, which can provide a more polished appearance.
- Typically, reclaimed wood flooring is wider than new materials, creating a classic, upscale look. It also increases your home value.
Finding the perfect reclaimed wood floors that match the look you're going for may be a bit more challenging than buying all new wood, but the benefits far outweigh the hassle. Plus, your wallet will thank you, and you'll be left with a gorgeous home to live in.
Where to Buy Reclaimed Wood ?
If you want to turn your entire home into a statement piece, reclaimed wood flooring is for you. Here are a few places you can shop for reclaimed wood:
- Online reclaimed wood dealer
- Home Depot
- Craigslist
- Local Facebook ads
However, if you need a high-quality, reliable supplier you can trust, Manomin Resawn Timbers is here for you. We're dedicated to providing the best reclaimed wood to make your home your favorite place to be.
We'll partner with you to make sure you get exactly the style you're looking for. Contact MR Timbers to get a free quote for reclaimed wood flooring.
The Best Wood Flooring: 5 Reasons to Choose Reclaimed Wood
There’s a certain feeling you get when you walk into a home that instantly feels warm, grounded, and real. Not staged. Not overly polished. Just right. Often, that feeling starts underfoot.
Reclaimed wood flooring has a way of making a space feel lived-in from day one, […]
