Install a Reclaimed Wood Ceiling in 5 Easy Steps
So you want to install a reclaimed wood ceiling in your home? Today we’re breaking down how to install a reclaimed wood ceiling in five easy steps! While it’s not always a DIY-friendly process, if you have a little know-how and some help from Google and YouTube, you’ll be able to pull it off and have your ceilings looking beautiful. Before installing your reclaimed wood

By Sarah Londerville | Updated November 22, 2022
So you want to install a reclaimed wood ceiling in your home? Today we're breaking down how to install a reclaimed wood ceiling in five easy steps!
While it's not always a DIY-friendly process, if you have a little know-how and some help from Google and YouTube, you'll be able to pull it off and have your ceilings looking beautiful.
Before installing your reclaimed wood ceiling, you'll need to obtain reclaimed wood. There are two ways that you can find reclaimed wood.
You can either purchase it from a place like Manomin Resawn Timbers, where the wood is treated and prepared to install, or find it, clean it, and treat it yourself.
Let's assume for this article that you start at the beginning and need to find some wood to reclaim for your project.
1: Finding Reclaimed Wood
It can be fairly easy to find, depending on your experience in harvesting and accessing wood. Here are a few examples of places where you can reclaim old wood.
- Old barns
- Old fences
- Warehouses
- Factories
- Abandoned houses
- Pallets
These are just a few places, but anywhere you can find wood planks, beams, or panels is an option to get reclaimed wood. Don't be afraid to look in unexpected places; remember that you can also cut it to fit your intended use.

2: Cleaning and Milling Reclaimed Wood
After obtaining the wood, you'll need to move to a cleaning process and mill it. This process is crucial because if you don't complete it correctly, you could ruin your wood and tools or hurt yourself.

Here are the steps to successfully clean and mill your own reclaimed lumber:
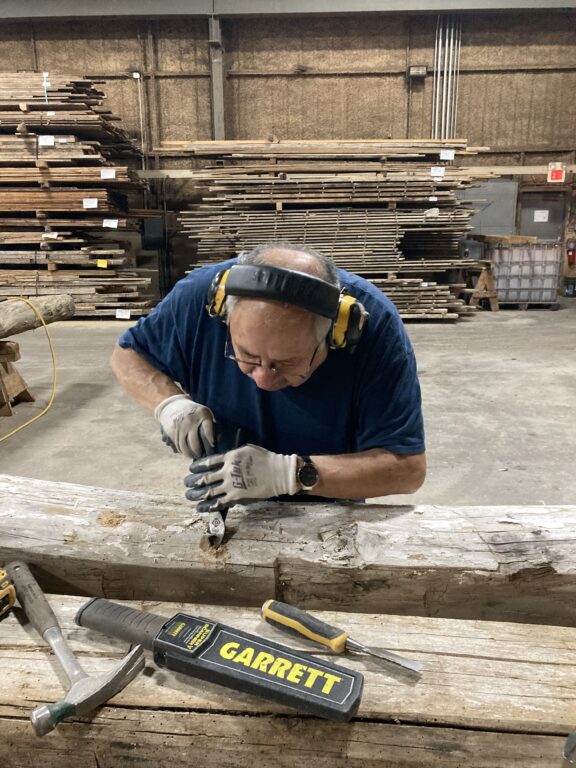
- Remove any nails or metal that is in the wood. If you're working with large beams, you may consider using a metal detector to ensure you get everything out.
- Clean the wood. This can be done with a garden hose, bristle brush, and soap.
- Let the wood dry out after it's been washed. This ensures that there won't be any rot from the wood.
- Treat the wood for insects. There are several ways to do this, but one quick and easy way is putting together a borax and water mixture to spray down the wood.
You can read more here for tips on cleaning and prepping the wood.
After cleaning the wood, you can mill it to whatever size you'd like. The milling process might take a few tools and some skill, but here's a great video example of how you can clean and mill your own reclaimed wood.
3: Preparing Your Ceiling for Reclaimed Wood
After your wood is prepped and ready for installation, you'll need to prepare your ceiling. There are a few different ways you can do this, but we'll show you the way that we find most effective. Here's the step-by-step breakdown of preparing your ceiling.
- Locate all the wires, vents, and other obstructions in the ceiling. You'll need to cut plywood and your reclaimed wood around these obstructions.
- You'll need to mark each ceiling studs where you can nail. Do this by using a stud finder and a chalk line so that you know exactly where they are.
- Nail plywood sheets to the ceiling. Be sure you're nailing each of these sheets to the studs in the ceiling so they'll stay in place.
- Paint the plywood sheets black. This doesn't need to be perfect, but getting a good consistent coat on the ceiling is good. We recommend doing this in case of cracks or holes in the paneling (which would be characteristics of the reclaimed wood). The color underneath (the plywood) won't poke through and results in an undesirable look.
- Mark out the studs again on top of the black-painted plywood.
After you've completed those five steps, you can move to the installation process.
4: Installing the Reclaimed Wood Ceiling
Installing the reclaimed wood might be one of the easiest parts of the entire process. As long as you have all of the studs properly marked out on the plywood, you'll be able to install the reclaimed wood planks quickly. To ensure that you can nail the boards equally, you'll need to place them vertically against the studs.
The pattern in that you install the wood planks is completely up to you. In most cases, it will take two people just a few hours to nail up a wood ceiling for a small project.

5 Clean Up and Enjoy Your Space
After you've got the wood installed on your ceiling, all that's left is to clean up the mess and enjoy the new life that a reclaimed wood ceiling can breathe into your space. The cleanup process is simple; just take a dry towel to the ceiling and do your best to dust off any sawdust or other remaining dirt.
After you've done that, make sure to dust the other surfaces in your home that might have gotten dirty or dusty throughout the process. After all the dusting is complete, you'll only have to vacuum up the floors and move the furniture back into the room.
If all of the preparation that goes into getting reclaimed wood ready for installation scares you, there is another option! You can contact MR. Timbers and receive a quote for what it would cost to get enough lumber for your ceiling project. Reach out to us today to learn more!
The Best Wood Flooring: 5 Reasons to Choose Reclaimed Wood
There’s a certain feeling you get when you walk into a home that instantly feels warm, grounded, and real. Not staged. Not overly polished. Just right. Often, that feeling starts underfoot.
Reclaimed wood flooring has a way of making a space feel lived-in from day one, […]


