How to Easily Get Rid of Annoying Wood Mites in 7 Simple Steps
Having the stress of dealing with wood mites invading your home can be both frustrating and unsettling. These tiny pests can quickly multiply and become nuisances if not addressed promptly. However, with the right approach, you can eliminate wood mites from your living space and keep them away. In this guide, we’ll walk you through step-by-step instructions to rid your home of wood mites

By Sarah Londerville | Updated January 15, 2026
Having the stress of dealing with wood mites invading your home can be both frustrating and unsettling. These tiny pests can quickly multiply and become nuisances if not addressed promptly. However, with the right approach, you can eliminate wood mites from your living space and keep them away. In this guide, we'll walk you through step-by-step instructions to rid your home of wood mites safely and efficiently on your own.
Steps to Eliminating Wood Mites
Step 1: Identification of Wood Mites
The first step in tackling a wood mite infestation is accurately identifying these pests' presence. Wood mites are tiny white bugs that resemble fleas in appearance. They are usually difficult to spot individually and often appear in large numbers, particularly in damp or moist environments.
Watch for warning signs in your home, such as leaf damage on indoor plants, wood mites on furniture, or their presence around windows and doors. Although wood mites don't bite living organisms or cause structural damage, they're still unwelcome guests in your home. Another great wood mite articles featured on our site is "Everything you need to know about wood mites," which was co-written with our friends at Neon Lion Media.
Step 2: Locate Their Habitat
Wood mites typically thrive in damp environments, such as wet wood piles or behind moist tree bark. Take the time to identify the source of the infestation in your home, which could be as simple as a particular wooden item or even a pile of wet firewood in your backyard.
Step 3: Moisture Control
Addressing moisture issues inside your home is crucial for eliminating wood mites. Pinpoint and repair any leaks immediately, especially in your bathroom, kitchen, or plumbing under sinks. Use a dehumidifier to reduce moisture levels and ensure proper ventilation in damp areas like basements to prevent mold buildup.

Step 4: Thorough Cleaning
Implement a thorough cleaning regimen to remove wood mites and their eggs from your home—vacuum, and steam clean all surfaces, including floors, furniture, and upholstery. Pay special attention to hard-to-reach areas and use hot water and high-quality cleaners for mopping and washing textiles. Clean up clutter, garbage areas, dirty dishes—anything to keep your home clean and organized.

Step 5: Seal Entry Points
Prevent wood mites from re-entering your home by properly sealing any cracks or gaps in walls, window frames, and door frames with caulk, spray foam, or other sealants. This will also help keep other pests at bay. Visit your local hardware store for advice on the best products and how to use them properly.
Step 6: Treatment Options
Choose an appropriate treatment method to eliminate wood mites from your home. You can opt for natural remedies like essential oils, homemade mixtures, or commercial insecticides targeting mites. Follow the instructions carefully and take the necessary safety precautions when using chemical treatments.
Helpful Insecticides for Tackling Wood Mites
Essential Oils
Tea tree, peppermint, and eucalyptus essential oils are known for effectively repelling mites. To create a natural repellent, mix one teaspoon of each essential oil with one cup of water in a spray bottle. Apply the mixture to damp wood or areas where wood mites are present. This solution can also be used outdoors on firewood, decks, or outdoor furniture.

Apple Cider Vinegar and Borax
Another homemade remedy involves using apple cider vinegar and borax. Apple cider vinegar's acidity is a natural insecticide against wood mites and other pests. Combine half a cup of apple cider vinegar, half a cup of borax, and half a cup of hot water in a spray bottle. Shake the mixture thoroughly to dissolve the borax. Spray the solution onto affected areas every two or three days until no mites are visible for at least one week.
Anti Wood Mites Insecticide
Alternatively, you can use a pre-made insecticide specifically designed to target mites. Look for a "miticide" product at your local store. After thoroughly cleaning the affected areas, follow the instructions on the insecticide label for application. Remember to wear gloves, safety glasses, and a respirator mask when using insecticides, as they contain harsh chemicals.
Step 7: Prevention Measures
After you've dealt with the problem, take proactive steps to prevent repeated wood mite infestations. Consider consulting a pest control professional for ongoing prevention strategies. If you are remodeling or building furniture with reclaimed wood, find accredited suppliers to prevent the purchase of infested materials. While it's impossible to guarantee that wood mites will never return to your home, you can take proactive measures to minimize their presence.
Control Moisture Levels
Remember that wood mites are attracted to moisture, so it's crucial to limit moisture in your home moving forward. Check if your outdoor fixtures, hoses, or faucets are pooling any water. Promptly fix any plumbing or roof leaks immediately and maintain optimal humidity levels. Do not wait if you spot a new leak. Additionally, avoid overwatering your yard or garden, as wood mites can be attracted to damp vegetation.
Assess Your Garden
Regularly inspect your garden to see if any plants are attracting mites. If so, consider removing and disposing of these plants to prevent mites from migrating indoors. Wrap the culprits in plastic to prevent them from finding a way back in.
Stay Vigilant
Watch for signs of wood mites and act promptly if you notice an infestation. Don't hesitate to seek assistance from a pest control professional for peace of mind.
Dealing with wood mites requires patience, diligence, and the right approach. Following these step-by-step instructions, you can effectively remove wood mites from your home and create a healthier living environment for you and your family. Remember to stay on top of things and promptly address any signs of infestation to prevent reoccurrence.
Manomin's Approach to Wood Mite Prevention
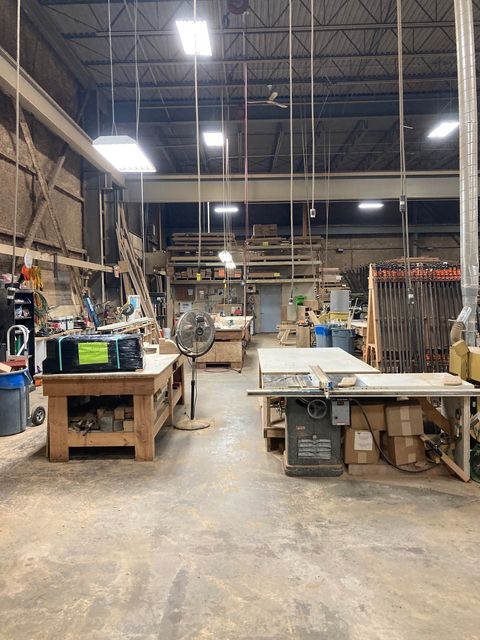
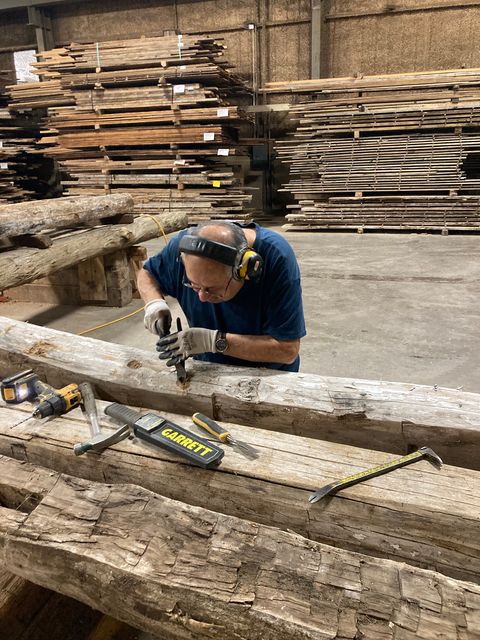
At Manomin Resawn Timbers, we understand the importance of ensuring reclaimed wood products are free from wood mites. That's why we employ a thorough four-step process before offering our reclaimed wood for sale:
1. De-nailing 2. Kiln drying 3. Milling 4. Installation
The kiln drying step is crucial, eliminating bugs and larvae in the wood. By achieving the perfect moisture content equilibrium, our kiln dried wood is inhospitable to wood mites and their eggs. While some reclaimed wood companies skip that step, we prioritize it.
We're Committed to Your Peace of Mind.
We recognize that dealing with wood mites can be a nuisance, so we're dedicated to providing wood products free from pests. Our proven process ensures that your home remains a peaceful sanctuary, free from the discomfort of wood mites.
Please get in touch with our friendly team if you have any questions about our reclaimed wood products or our treatment process. We're here to help you create a beautiful and pest-free living environment.
The Best Wood Flooring: 5 Reasons to Choose Reclaimed Wood
There’s a certain feeling you get when you walk into a home that instantly feels warm, grounded, and real. Not staged. Not overly polished. Just right. Often, that feeling starts underfoot.
Reclaimed wood flooring has a way of making a space feel lived-in from day one, […]
